Seamlessly Integrating BizTalk with Azure Service Bus: A Developer’s Ultimate Guide
Table of Contents
Introduction – BizTalk with Azure Service Bus
In today’s cloud-centric world, integrating on-premises applications with cloud-based services is a key challenge. BizTalk Server, a widely used integration tool, can communicate with Azure Service Bus to enable reliable messaging between systems. This guide walks you through setting up connectivity between BizTalk and Azure Service Bus, allowing seamless data exchange and improving integration workflows.
Tools Required
- BizTalk Server
- Azure Service Bus
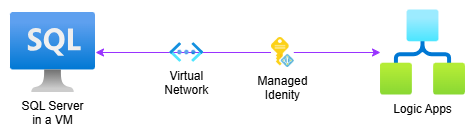
Architecture Overview
The integration between BizTalk and Azure Service Bus enables message exchange via queues, ensuring reliable communication between applications. This architecture is especially useful for hybrid cloud solutions, where on-premises applications need to interact with cloud-based services.

Step-by-Step Procedure
1. Creating an Azure Service Bus Queue
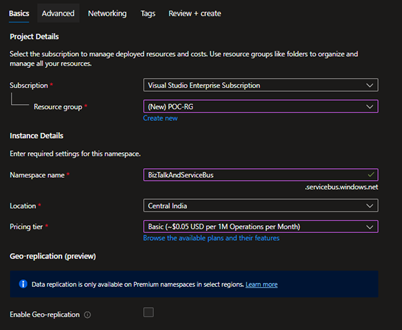
- Log in to the Azure Portal.
- Search for Service Bus and create a new instance.
- Choose the Basic pricing tier for this demo.
- Navigate to Queues and create a new queue.
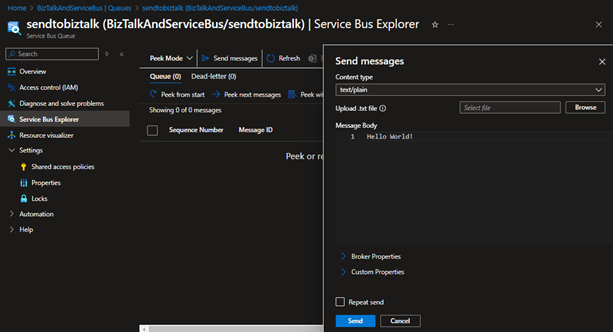
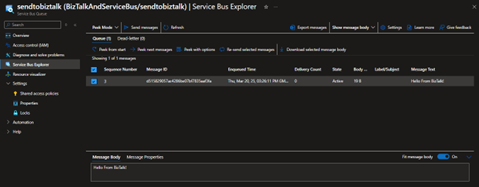
- Once created, go to the queue and open Service Bus Explorer.
- Use the Send Messages option to create and send a test message.
- Verify that the message is available in the queue using Peek Mode.


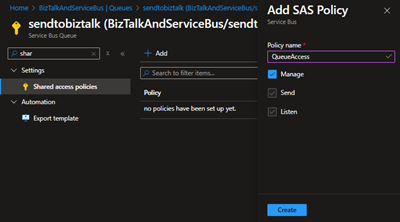
2. Configuring Shared Access Signature (SAS)
- Navigate to the queue settings.
- Select Shared access policies.
- Click +Add, provide a Policy Name, and enable Manage and Create permissions.
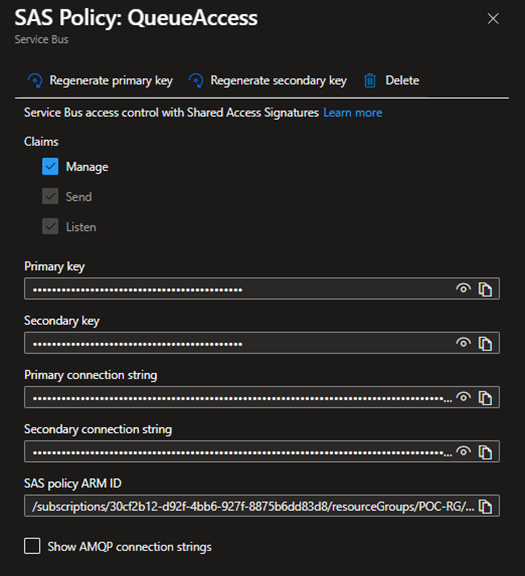
- Save the policy and copy the Primary Key for authentication.
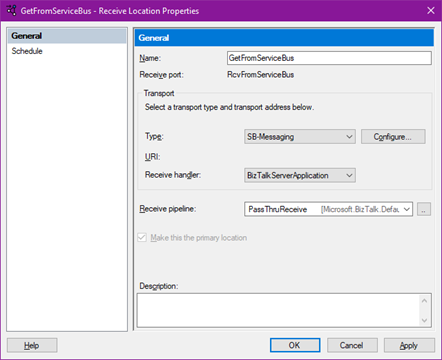
3. Receiving Messages from Azure Service Bus in BizTalk
- Create a BizTalk Application with a Receive Port and Receive Location.
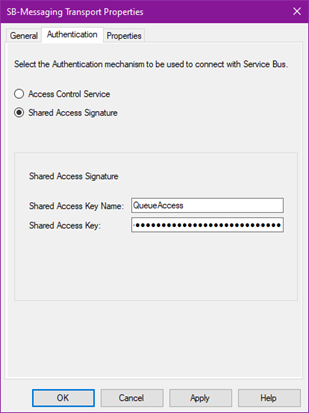
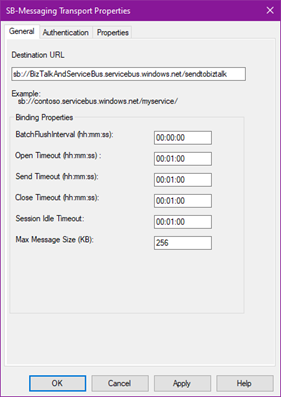
- Choose SB-Messaging as the receive type and configure it with the following:
- Queue URL:
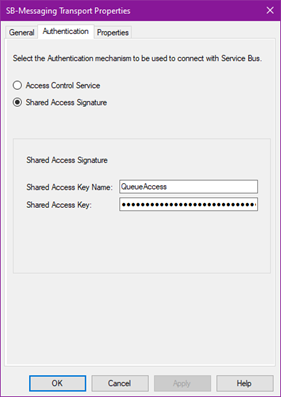
sb://<Namespace>.servicebus.windows.net/<QueueName> - Authentication: Shared Access Signature (SAS)
- Policy Name: Shared Access Key Name
- Key: Primary/Secondary Key
- Queue URL:

- Click OK to save the configuration.
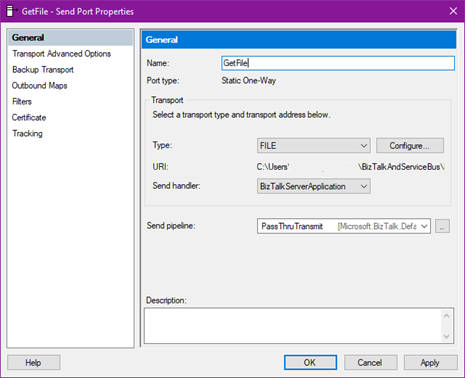
- Create a BizTalk Send Port:
- Select FILE as the type.
- Choose a folder where messages from Service Bus will be stored.
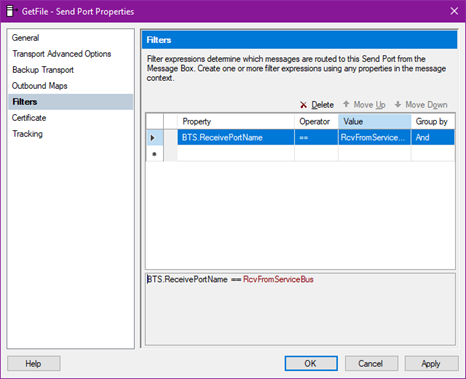
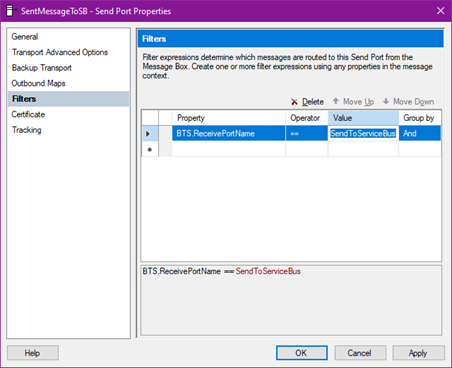
- Configure Filters:
BTS.ReceivePortName == RcvFromServiceBus
- Activate the Send Port and Receive Location.
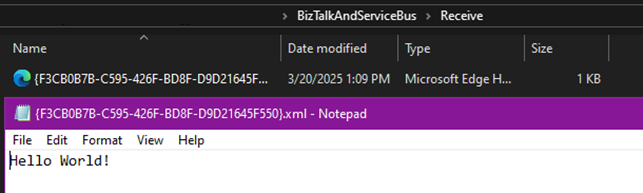
- Messages from Azure Service Bus will now be stored in the specified folder.
4. Sending Messages to Azure Service Bus from BizTalk
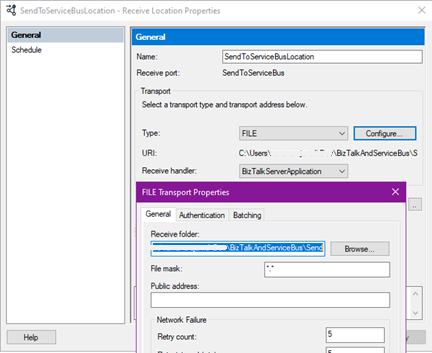
- Create a Receive Location in BizTalk:
- Select FILE type and specify a folder where data files will be dropped.
- Create a Send Port:
- Choose SB-Messaging as the send type and configure it with the same details as above.
- Set Filters:
BTS.ReceivePortName == SendToServiceBus
- Activate the Send Port and Receive Location.
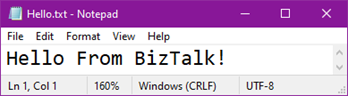
- Drop a file containing test data in the designated folder.
- Ensure that ‘Send Messages to BizTalk Receive Location’ is turned off to prevent BizTalk from picking up the message again.
- Verify the message in the Azure Service Bus queue using Peek Mode.
Conclusion
By integrating BizTalk with Azure Service Bus, organizations can enhance messaging capabilities, ensuring reliable, scalable communication between applications. This setup enables seamless hybrid cloud integration, real-time data processing, and improved system performance, while simplifying complex workflows and boosting operational efficiency.
Next Steps
- Explore Service Bus Topics for better message routing and scalability.
- Implement Azure Functions to process messages dynamically.
- Optimize message filtering and error handling for a robust solution.
This guide provides a solid foundation for integrating BizTalk with Azure Service Bus. Start building your hybrid cloud integration today!
Thank You!
Thanks for reading! We hope this guide helps you set up a smooth BizTalk and Azure Service Bus integration. If you have any questions, suggestions, or experiences to share, feel free to mention them in the comments. We’d love to hear your feedback!